ISD Imperial Stardestroyer PC Buildlog

Andreas

Active member
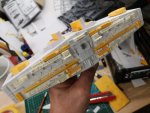
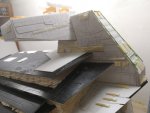
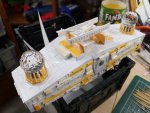
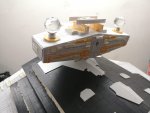
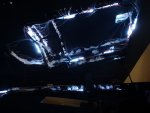
Moin ( north slang call Plattdeutsch) from Germany to all , here I wanted to show you again that the ISD was created and that also accompany with a bit of text.
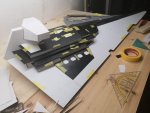
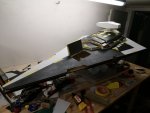
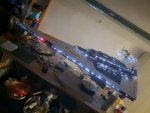
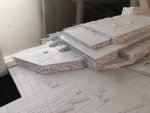
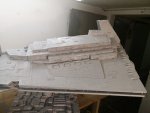
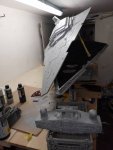
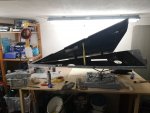
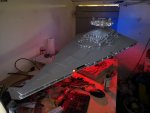
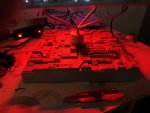
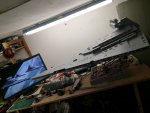
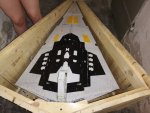
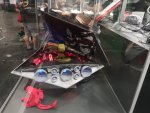
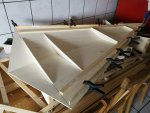
At the beginning there was a Russian Revell model that I enlarged by a factor of 2.5.
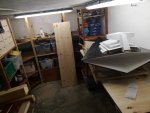
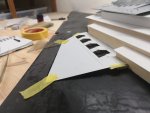
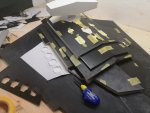
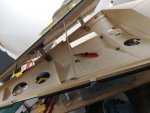
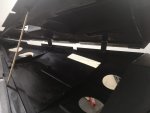
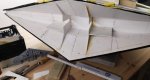
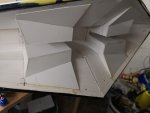
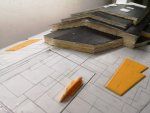
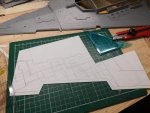
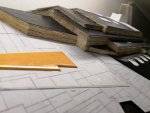
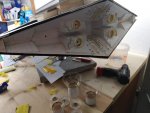
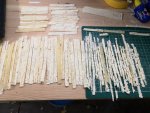
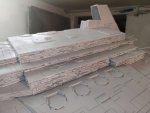
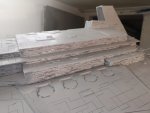
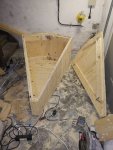
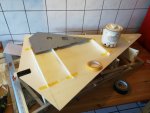
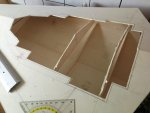
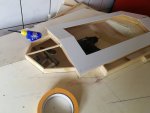
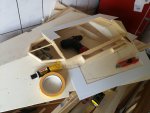
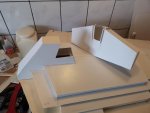
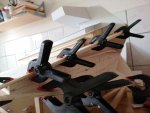
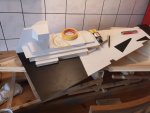
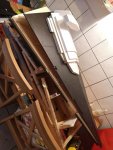
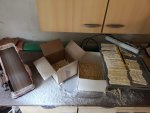
As material were available with wood and polystyrene.
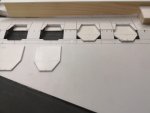
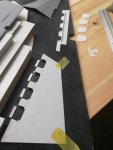
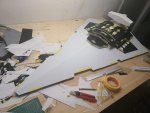
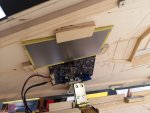
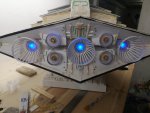
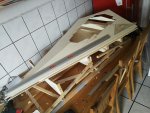
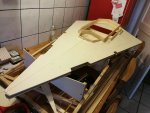
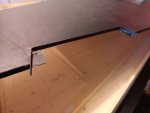
I quickly realized that in the superstructure wood already reaches its limits and I already started to combine wood with polystyrene.
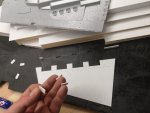
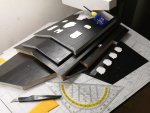
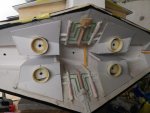
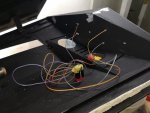
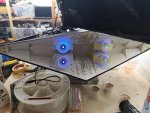
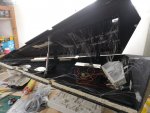
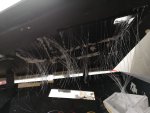
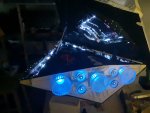
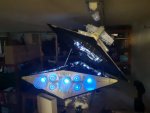
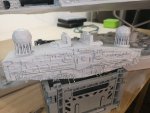
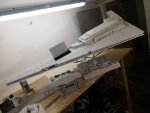
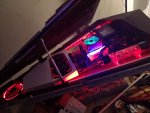
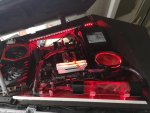
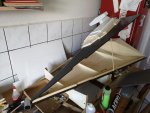
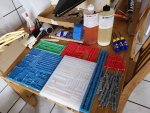
Since the thought went off that the head must be removable because of the fiber optic cables and the LEDs.
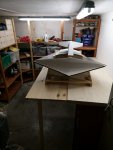
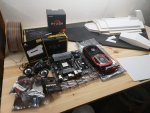
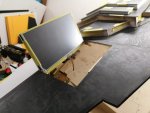
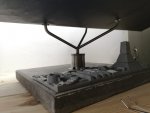
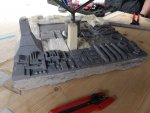
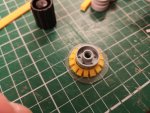
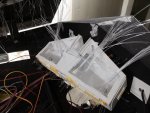
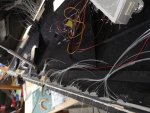
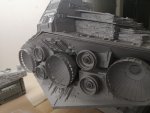
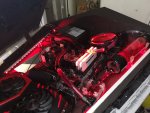
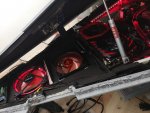
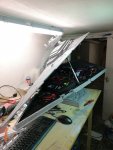
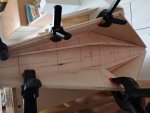
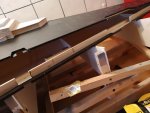
The engine unit was also tricky but with some brooding to master.
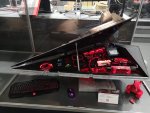
 

Attachments

  • 28554871_783767055144230_632455957_o.jpg
    28554871_783767055144230_632455957_o.jpg
    123.5 KB · Views: 2
  • 29939286_800306763490259_1436533923_n.jpg
    29939286_800306763490259_1436533923_n.jpg
    107.3 KB · Views: 2
  • 29993655_799853183535617_517820078_o.jpg
    29993655_799853183535617_517820078_o.jpg
    371.2 KB · Views: 2
  • 29995613_799853163535619_1091344112_o.jpg
    29995613_799853163535619_1091344112_o.jpg
    224 KB · Views: 2
  • 30126396_800939866760282_94553225_o.jpg
    30126396_800939866760282_94553225_o.jpg
    273.3 KB · Views: 2
  • 30546544_805820192938916_1290345610_o.jpg
    30546544_805820192938916_1290345610_o.jpg
    136.4 KB · Views: 2
  • 30546640_805820202938915_418258362_o.jpg
    30546640_805820202938915_418258362_o.jpg
    162.3 KB · Views: 2
  • 9.jpg
    9.jpg
    181.5 KB · Views: 2
  • 5.jpg
    5.jpg
    114.4 KB · Views: 2
  • 6.jpg
    6.jpg
    103 KB · Views: 2

Andreas

Active member
When this was designed as such, it was to further improve the shell.
For this I have already glued as the Harrower a 0.5mm polystyrene layer with pattex on the wood.
Because this is so softened that she does not look nice, I then applied a second with Revell needle glue.
The whole thing could not float and the base for it had to be built sometimes fixed.
At the same time I had to come up with something because the sponsors wanted to show their hardware on the GC, which was a matter of course.
So it had synonymous for a joint construction ago that does not exist.

Then it went on with Resin.
I have taken original parts in Giessilikon created a form and reproduced with Resin.
 

Attachments

  • 13.jpg
    13.jpg
    109.6 KB · Views: 1
  • 14.jpg
    14.jpg
    116.1 KB · Views: 1
  • 16.jpg
    16.jpg
    50.2 KB · Views: 1
  • 17.jpg
    17.jpg
    146 KB · Views: 1
  • 21.jpg
    21.jpg
    119.7 KB · Views: 2
  • 19.jpg
    19.jpg
    179.2 KB · Views: 2
  • 20.jpg
    20.jpg
    98.2 KB · Views: 2
  • 23.jpg
    23.jpg
    120.6 KB · Views: 1
  • 25.jpg
    25.jpg
    131.7 KB · Views: 1

Andreas

Active member
Then my wife justifiably had problems with the kitchen and I finally got my giant cellar. This then got a shelving system and a huge table to build :)
I was able to get started there and continued to work without getting in anyone's way :)
As the hardware came I could also see if everything fits as I had imagined.
 

Attachments

  • 24.jpg
    24.jpg
    104.7 KB · Views: 2
  • 26.jpg
    26.jpg
    90.8 KB · Views: 2
  • 29.jpg
    29.jpg
    127.6 KB · Views: 2
  • 31.jpg
    31.jpg
    117.2 KB · Views: 2
  • 35.jpg
    35.jpg
    107.5 KB · Views: 2
  • 36.jpg
    36.jpg
    73.4 KB · Views: 2
  • 39.jpg
    39.jpg
    129.7 KB · Views: 2
  • 37.jpg
    37.jpg
    87.8 KB · Views: 2
  • 40.jpg
    40.jpg
    81.8 KB · Views: 2
  • 41.jpg
    41.jpg
    165.6 KB · Views: 2

Andreas

Active member
It was diligently glued on and a locksmith of my trust consulted for a tripod that I screwed onto a stone slab.
On it I wanted to have a death star optics, which I still find very cool today.
When the hardware had its place holes for the fans were drilled.
In this project, there was also a 7 inch monitor, which should be hinged.
 

Attachments

  • 43.jpg
    43.jpg
    132 KB · Views: 1
  • 44.jpg
    44.jpg
    151.1 KB · Views: 1
  • 48.jpg
    48.jpg
    138.8 KB · Views: 1
  • 53.jpg
    53.jpg
    128.7 KB · Views: 1
  • 54.jpg
    54.jpg
    137.2 KB · Views: 1
  • 50.jpg
    50.jpg
    99.5 KB · Views: 1
  • 51.jpg
    51.jpg
    187.9 KB · Views: 1
  • 55.jpg
    55.jpg
    150.2 KB · Views: 1
  • 62.jpg
    62.jpg
    92.7 KB · Views: 1

Andreas

Active member
After that came the annoying topic of engines.
I also had to brood, tinker and glue a bit more and to understand how it used to be done at Lucas Arts.
The imemr cast Resinteile was also sanded and glued.
The polystyrene plates are scratched and glued as matt.
Then came Alphacool into the game with a lot of great technique.
 

Attachments

  • 56.jpg
    56.jpg
    124.1 KB · Views: 1
  • 64.jpg
    64.jpg
    254.4 KB · Views: 1
  • 57.jpg
    57.jpg
    92.3 KB · Views: 1
  • 59.jpg
    59.jpg
    86.4 KB · Views: 1
  • 69.jpg
    69.jpg
    147.9 KB · Views: 1
  • 85.jpg
    85.jpg
    133.5 KB · Views: 1
  • 86.jpg
    86.jpg
    100 KB · Views: 1
  • 87.jpg
    87.jpg
    118.3 KB · Views: 1
  • 87.jpg
    87.jpg
    118.3 KB · Views: 1
  • 81.jpg
    81.jpg
    150.3 KB · Views: 1

Andreas

Active member
Details, details, details, the bridge finally had to be finished and luckily I knew someone who knew what Lucas Arts used to do for the shield generators.
It is hard to believe but it was Russian glass crystal buttons for cabinets: D
Time also went on with the engines.
 

Attachments

  • 89.jpg
    89.jpg
    124.5 KB · Views: 1
  • 75.jpg
    75.jpg
    164.9 KB · Views: 1
  • 80.jpg
    80.jpg
    141.2 KB · Views: 1
  • 82.jpg
    82.jpg
    218.1 KB · Views: 1
  • 66.jpg
    66.jpg
    127.5 KB · Views: 1
  • 68.jpg
    68.jpg
    163.9 KB · Views: 1
  • 91.jpg
    91.jpg
    152.4 KB · Views: 1
  • 96.jpg
    96.jpg
    121.5 KB · Views: 1
  • 108.jpg
    108.jpg
    159.5 KB · Views: 1
  • 110.jpg
    110.jpg
    109.7 KB · Views: 1

Andreas

Active member
The constriction stood as such now so finally the fiber optic cable and LEDs could be used.
If I recall correctly, something over 600 holes have been drilled and fitted with fiber optic cable and glued.
 

Attachments

  • 103.jpg
    103.jpg
    124.7 KB · Views: 2
  • 104.jpg
    104.jpg
    164.7 KB · Views: 2
  • 115 - Kopie - Kopie - Kopie.jpg
    115 - Kopie - Kopie - Kopie.jpg
    157.6 KB · Views: 2
  • 117 - Kopie.jpg
    117 - Kopie.jpg
    168.7 KB · Views: 2
  • 119.jpg
    119.jpg
    208.5 KB · Views: 3
  • 118 - Kopie.jpg
    118 - Kopie.jpg
    182.1 KB · Views: 3
  • 114 - Kopie - Kopie - Kopie.jpg
    114 - Kopie - Kopie - Kopie.jpg
    183.1 KB · Views: 3

Andreas

Active member
The next step was to equip all of them with LEDs, to lay the cables properly and to energize them.
You're probably wondering why they all look so far out, but these fiber optic cables are finally turned off after painting.
In this case it was then a few more rounds with airbrush.
 

Attachments

  • 120.jpg
    120.jpg
    100.1 KB · Views: 4
  • 122.jpg
    122.jpg
    117.8 KB · Views: 4
  • 123.jpg
    123.jpg
    138 KB · Views: 4
  • 125.jpg
    125.jpg
    143.1 KB · Views: 4
  • 126.jpg
    126.jpg
    128.1 KB · Views: 4

Andreas

Active member
Bridge and cannons were made extra and after 3 or 4 passes it was time.
I was able to stand up and say the ISD is ready and it can get in the technique.
 

Attachments

  • 127.jpg
    127.jpg
    126.1 KB · Views: 1
  • 129.jpg
    129.jpg
    123.4 KB · Views: 1
  • 130.jpg
    130.jpg
    145.4 KB · Views: 1
  • 132.jpg
    132.jpg
    111.8 KB · Views: 1
  • 133.jpg
    133.jpg
    128.8 KB · Views: 1
  • 134.jpg
    134.jpg
    128.9 KB · Views: 1
  • 135.jpg
    135.jpg
    131.1 KB · Views: 1
  • 138.jpg
    138.jpg
    125.9 KB · Views: 1
  • 141.jpg
    141.jpg
    61.8 KB · Views: 1
  • 142.jpg
    142.jpg
    162.2 KB · Views: 1

Andreas

Active member
The first time a real water cooling.
I sweated blood and water and learned a lot
 

Attachments

  • 143.jpg
    143.jpg
    298 KB · Views: 4
  • 144.jpg
    144.jpg
    325.5 KB · Views: 3
  • 145.jpg
    145.jpg
    173.4 KB · Views: 3
  • 146.jpg
    146.jpg
    172.7 KB · Views: 3
  • 148.jpg
    148.jpg
    174.2 KB · Views: 3
  • 149.jpg
    149.jpg
    235.3 KB · Views: 3
  • 151.jpg
    151.jpg
    340.2 KB · Views: 3
  • 160.jpg
    160.jpg
    223.7 KB · Views: 3
  • 164.jpg
    164.jpg
    238.6 KB · Views: 2
  • 158.jpg
    158.jpg
    164.4 KB · Views: 1

Andreas

Active member
Then I was told to build a box that is important for transport and I built a box.
Well and then I got an exhibitor pass and needed no more box :(
 

Attachments

  • 180.jpg
    180.jpg
    213.6 KB · Views: 2
  • 179.jpg
    179.jpg
    170.7 KB · Views: 2
  • 181.jpg
    181.jpg
    179.8 KB · Views: 2

Andreas

Active member
Then I was allowed to make my way to Cologne to Gamescom 2018 and present the good piece.
I was overjoyed when it stood and worked in the Vetrine.
Today I can proudly say that the ISD is at Alphacool.
I'm not a hunter-gatherer, I love building and am glad that Alphacool wanted him and he can be seen there by anyone and not stand alone in the corner with me.
 

Attachments

  • 170.jpg
    170.jpg
    90.3 KB · Views: 6
  • 172.jpg
    172.jpg
    154.4 KB · Views: 6
  • 173.jpg
    173.jpg
    193.8 KB · Views: 7
  • 174.jpg
    174.jpg
    201.4 KB · Views: 9
  • 175.jpg
    175.jpg
    219.8 KB · Views: 9
Top